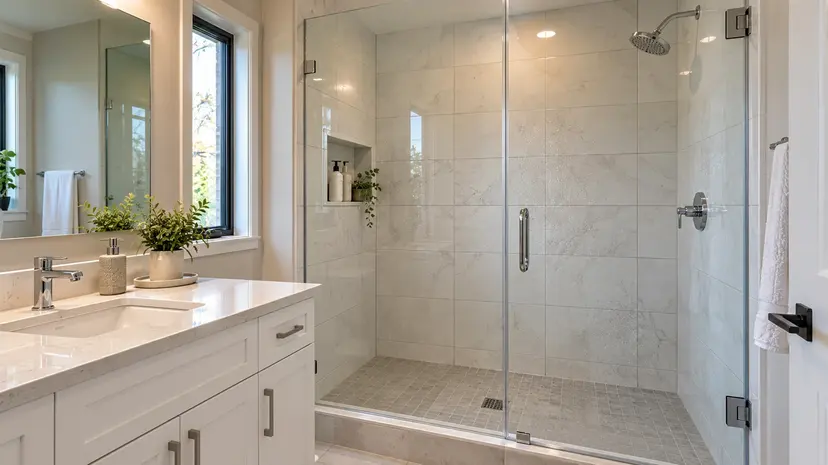
To clean shower tiles effectively, run hot water first to loosen buildup, apply a pH-neutral cleaner or baking soda paste (never use vinegar on natural stone), scrub with a soft nylon brush from top to bottom, rinse thoroughly, and squeegee or dry with a microfiber cloth. For grout, use a toothbrush with a baking soda and hydrogen peroxide paste and scrub along each joint. Repeat weekly. That is the short version keep reading for the complete system that actually keeps tiles clean long-term. For more information about our team and cleaning expertise, visit Red & White Cleaning Services.
Why Your Shower Tiles Keep Getting Dirty (Even After You Clean Them)
Most people think dirty shower tiles are a cleaning problem. They are actually a chemistry problem.
Every time water hits your tiles and evaporates, it leaves behind whatever minerals it was carrying calcium, magnesium, and silica as a chalky or yellowish film. In Ontario, water hardness is a genuine issue. Cities across the Waterloo Region, including Kitchener, Waterloo, Cambridge, and Guelph, pull water from groundwater sources with naturally high mineral content. That means every shower is depositing a microscopic layer of calcium onto your tiles, whether you can see it yet or not.
Then add bar soap. When the fatty acids in bar soap mix with the dissolved minerals in hard water, they form calcium soap that grey, sticky, streaky film known as soap scum. It is not dirt. It is a mineral compound, and it does not wipe off the way ordinary dirt does.
Finally, factor in humidity. After every shower, moisture lingers in the air and on surfaces. Within 24 to 48 hours, consistently damp grout, caulk, and textured tile surfaces become ideal environments for mold and mildew. The black specks in your grout lines and the pink streaks near drains are organisms, not stains and they need to be killed, not just scrubbed.
Understanding these three distinct problems (mineral deposits, soap scum, and biological growth) is what separates a cleaning routine that actually works from one that just makes the shower look temporarily better.
The Most Important Step Before You Touch a Cleaner: Know Your Tile Type
This is the section most how-to articles skip. It is also the section that prevents the most expensive mistakes.
Using the wrong cleaner on the wrong tile type can cause permanent, irreversible damage. It does not just fail to clean it can etch the surface, cloud the finish, destroy the sealer, or compromise the grout. Different tile types have fundamentally different surface chemistry and porosity levels.
Ceramic Tiles
Ceramic is the most common shower tile in Canadian homes. It is fired clay covered with a glazed surface, and that glaze is what makes it relatively stain-resistant. Because ceramic is fired at lower temperatures than porcelain, it is slightly more porous but the glaze still provides good protection. Ceramic is forgiving. It tolerates a wide range of cleaners, including diluted white vinegar, though we always recommend gentler options first to preserve the glaze over time.
Porcelain Tiles
Porcelain is denser, less porous, and more durable than ceramic. It is fired at higher temperatures and can be through-body coloured, meaning the colour runs all the way through the tile. Porcelain is among the easiest shower tile to maintain. A weekly wipe-down with a mild pH-neutral cleaner is usually sufficient. It resists staining naturally and holds up well to a wider range of cleaning approaches.
Natural Stone Tiles Marble, Travertine, Limestone, Slate
This is where things become critical. Natural stone is porous and chemically reactive in ways that ceramic and porcelain are not. The biggest mistake homeowners make repeatedly and at significant cost is using vinegar, lemon juice, or citrus-based cleaners on marble or travertine.
Here is why that matters. Vinegar is acidic. Marble, limestone, and travertine are calcium carbonate-based stones. When acid contacts calcium carbonate, a chemical reaction occurs that dissolves part of the stone surface producing a dull, frosted, or pitted appearance called etching. This is not a stain. It cannot be scrubbed out. The only way to reverse acid etching on marble is through professional stone honing and polishing, which is expensive and time-consuming.
For natural stone, always use a pH-neutral cleaner specifically formulated for stone. Never use vinegar, citric acid, lemon-based products, or most commercial bathroom sprays on marble, travertine, limestone, or similar stone tiles.
Glass Tiles
Glass tiles are non-porous and naturally resistant to staining, but they show water spots, soap residue, and fingerprints more visibly than any other tile type. They are also vulnerable to scratching from abrasive scrubbers or pads. Use only soft cloths or sponges with pH-neutral cleaners, and be religious about squeegeeing after every shower.
Mosaic and Small-Format Tiles
Mosaic tiles those small tiles set in mesh sheets have dramatically more grout lines per square foot than large-format tiles. More grout means more surface area for soap, mold, and mineral buildup to accumulate. They require more frequent grout maintenance and benefit greatly from quality grout sealer.
What You Need And What You Should Never Use
Essential Supplies
Rubber gloves (always wear these when cleaning)
Spray bottle (for homemade solutions)
Soft nylon scrub brush or dedicated tile brush
Old toothbrush (essential for grout lines)
Multiple microfiber cloths
Rubber squeegee (for walls and glass)
Baking soda
White distilled vinegar (for ceramic and porcelain only)
3% hydrogen peroxide
pH-neutral tile cleaner or mild dish soap
Stone-specific cleaner (for natural stone only)
Optional: electric spin scrubber, handheld steam cleaner
What to Avoid And Why
Vinegar on natural stone causes permanent acid etching. If your shower has marble, travertine, or limestone tiles, keep vinegar out of the bathroom entirely.
Steel wool and abrasive scrub pads scratch tile glazes and grout surfaces. Once glazed tile is scratched, those microscopic grooves hold dirt and become permanently harder to clean.
Undiluted bleach as a routine cleaner weakens grout sealer over time and can discolour coloured or grey grout. It is appropriate for periodic mold treatment but not for weekly cleaning.
Wire brushes damage every tile type without exception.
Generic multipurpose household sprays often contain abrasives, inappropriate pH levels, or ammonia in concentrations that will harm tile finishes or grout sealers.
Mixing bleach and vinegar produces chlorine gas, which is dangerous. Never combine cleaning products unless the label explicitly says it is safe.
Step-by-Step: How to Clean Shower Tiles (Standard Weekly Clean)
This process works for ceramic and porcelain tile showers. See the tile-specific and problem-specific sections below for natural stone, glass, and heavy staining situations.
Time required: 20 to 30 minutes
Recommended frequency: Once per week
Step 1: Clear the Space
Remove every bottle, razor, soap dish, caddy, and accessory from the shower. This is not a small thing most people leave bottles in place and clean around them, which means those zones never actually get cleaned. Grime and soap scum accumulate most aggressively right where bottles sit.
Step 2: Run Hot Water and Let Steam Build
Turn on the shower, close the bathroom door, and let hot water run for 2 to 3 minutes. The steam softens and rehydrates dried soap scum and mineral deposits, making everything significantly easier to remove. Think of it as pre-soaking without having to touch anything.
Step 3: Apply Your Cleaning Solution
For a simple, effective homemade cleaner: mix equal parts warm water and mild dish soap (like Dawn) in a spray bottle. Commercial pH-neutral tile cleaners also work well look for products labelled "safe for all tiles" or check that they are appropriate for your specific tile type.
Spray every tile surface generously all walls, the floor, around fixtures, grout lines, and corners. The key is dwell time. Let the solution sit for 5 to 10 minutes. Do not skip this. Cleaning solutions need contact time to break down soap scum and mineral buildup chemically. Spraying and immediately scrubbing is far less effective.
For tougher soap scum on ceramic and porcelain tiles: after spraying, sprinkle baking soda directly onto the damp tiles, then mist with undiluted white vinegar. It will fizz. That reaction is carbonic acid forming and breaking down mineral deposits. Let it sit for 5 minutes, then scrub.
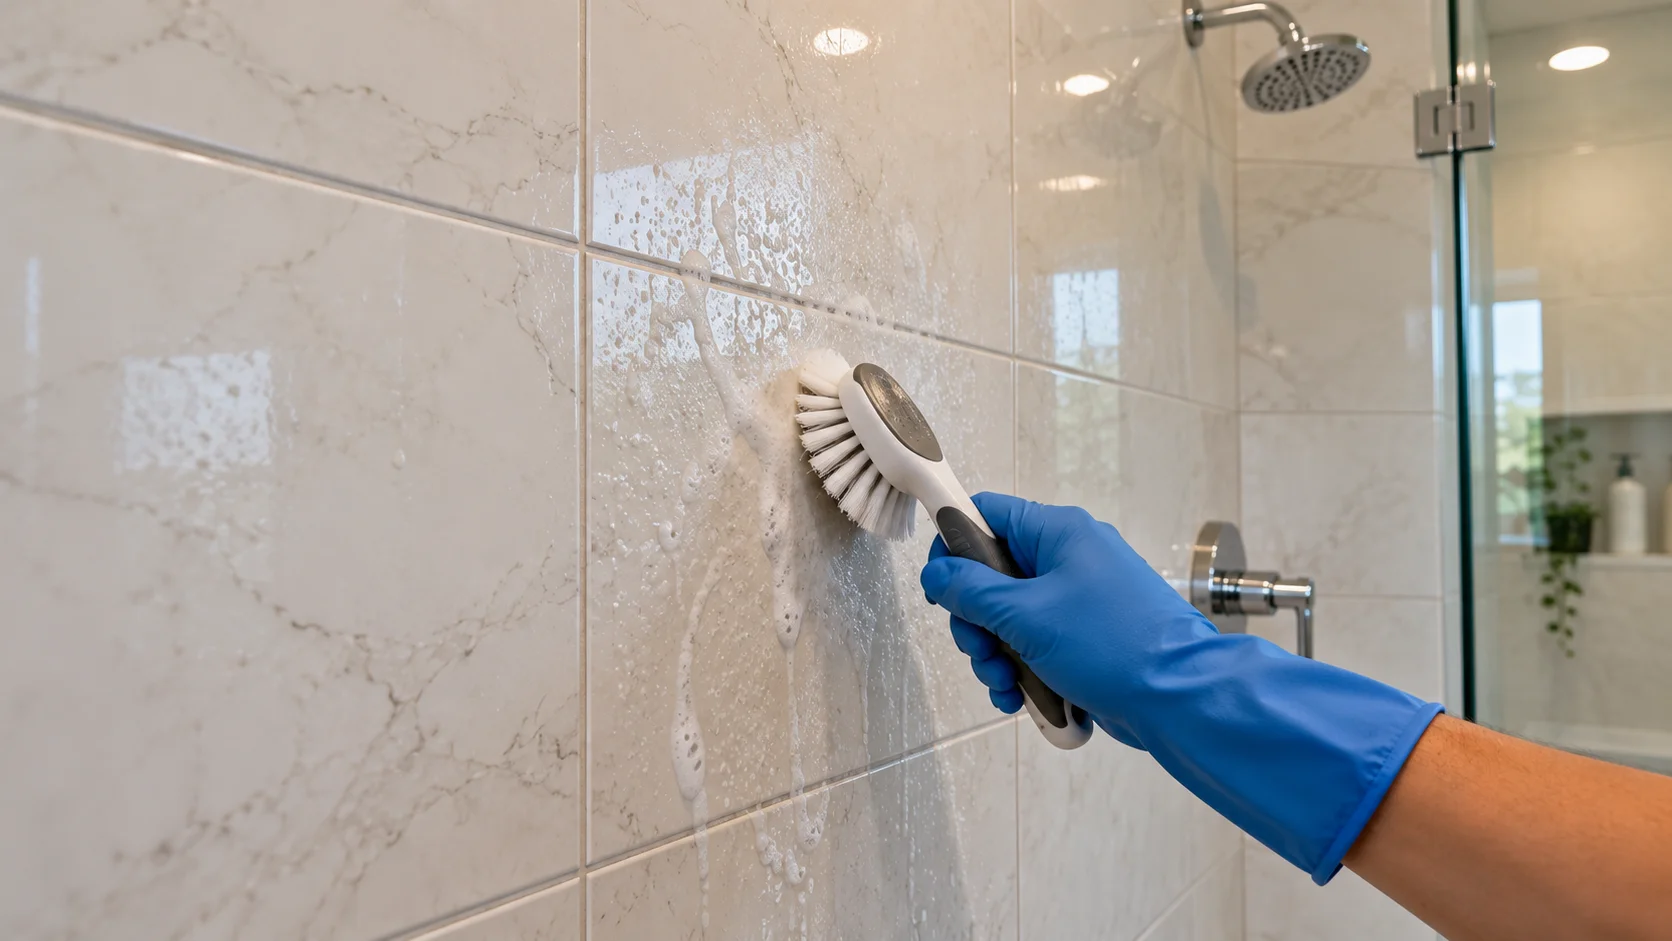
Step 4: Scrub Tiles Top to Bottom
Using your soft nylon scrub brush, work from the highest point on the wall downward in circular overlapping strokes. Always clean top to bottom loosened grime and dirty water will run down to areas you have not cleaned yet, not areas you just finished. Pay close attention to the areas directly around fixtures (faucets and showerheads accumulate significant mineral buildup), the lower walls (maximum soap scum zone), and all four corners.
For textured floor tiles, you will need extra dwell time and a stiffer brush. Textured surfaces trap soap, oils, and mineral deposits in their grooves.
Step 5: Target the Grout Lines
Switch to your old toothbrush and scrub each grout joint individually in short back-and-forth motions. For a standard weekly clean, your tile cleaner or leftover baking soda paste will usually be enough. Grout deep-cleaning is a separate process covered in full below.
Step 6: Scrub the Floor
Shower floors accumulate the highest concentration of soap scum and body oils because everything runs down to them. If you have a non-slip textured floor, give those grooves extra attention they trap buildup that a single pass will not remove. For very grimy floors, a second application of cleaner with additional dwell time helps significantly.
Step 7: Rinse Thoroughly From Top to Bottom
Rinse every surface with clean water, again working from top to bottom. This is more important than most people realise. Cleaning product residue left on tile creates a thin film that actually attracts and holds dirt faster than a clean, dry surface. Rinse until the water runs clear and you cannot feel any slickness on the tile with your hand.
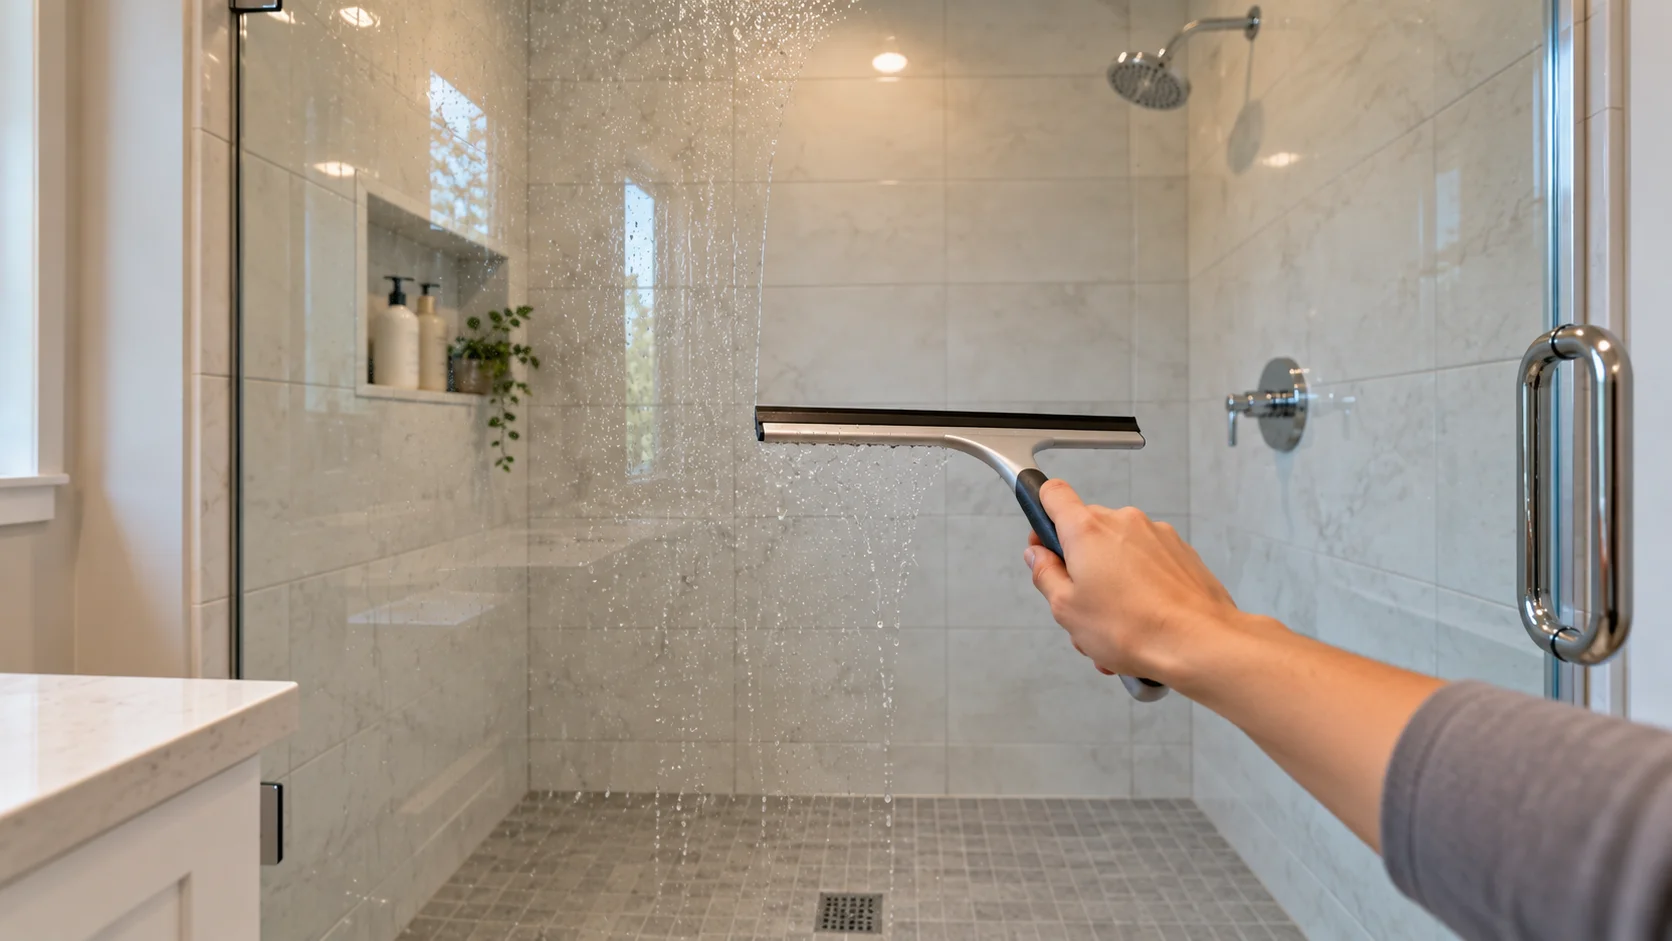
Step 8: Squeegee and Dry
Run a rubber squeegee from the top of each tiled wall to the bottom. This removes the standing water that, when it evaporates, leaves mineral deposits behind. Follow up with a dry microfiber cloth on any remaining moisture on the walls, door tracks, and fixtures. If you do nothing else from this guide, do this step it is the single most effective thing you can do to reduce buildup between cleans.
How to Clean Shower Tile Grout: Four Methods That Work
Grout is not just the filler between tiles it is a porous cement product that absorbs moisture, soap, oils, and bacteria deeply. Tile cleaning alone does not clean grout. Grout needs targeted, direct treatment to stay clean.
Method 1: Baking Soda and Hydrogen Peroxide Paste (Best All-Purpose M
ethod)
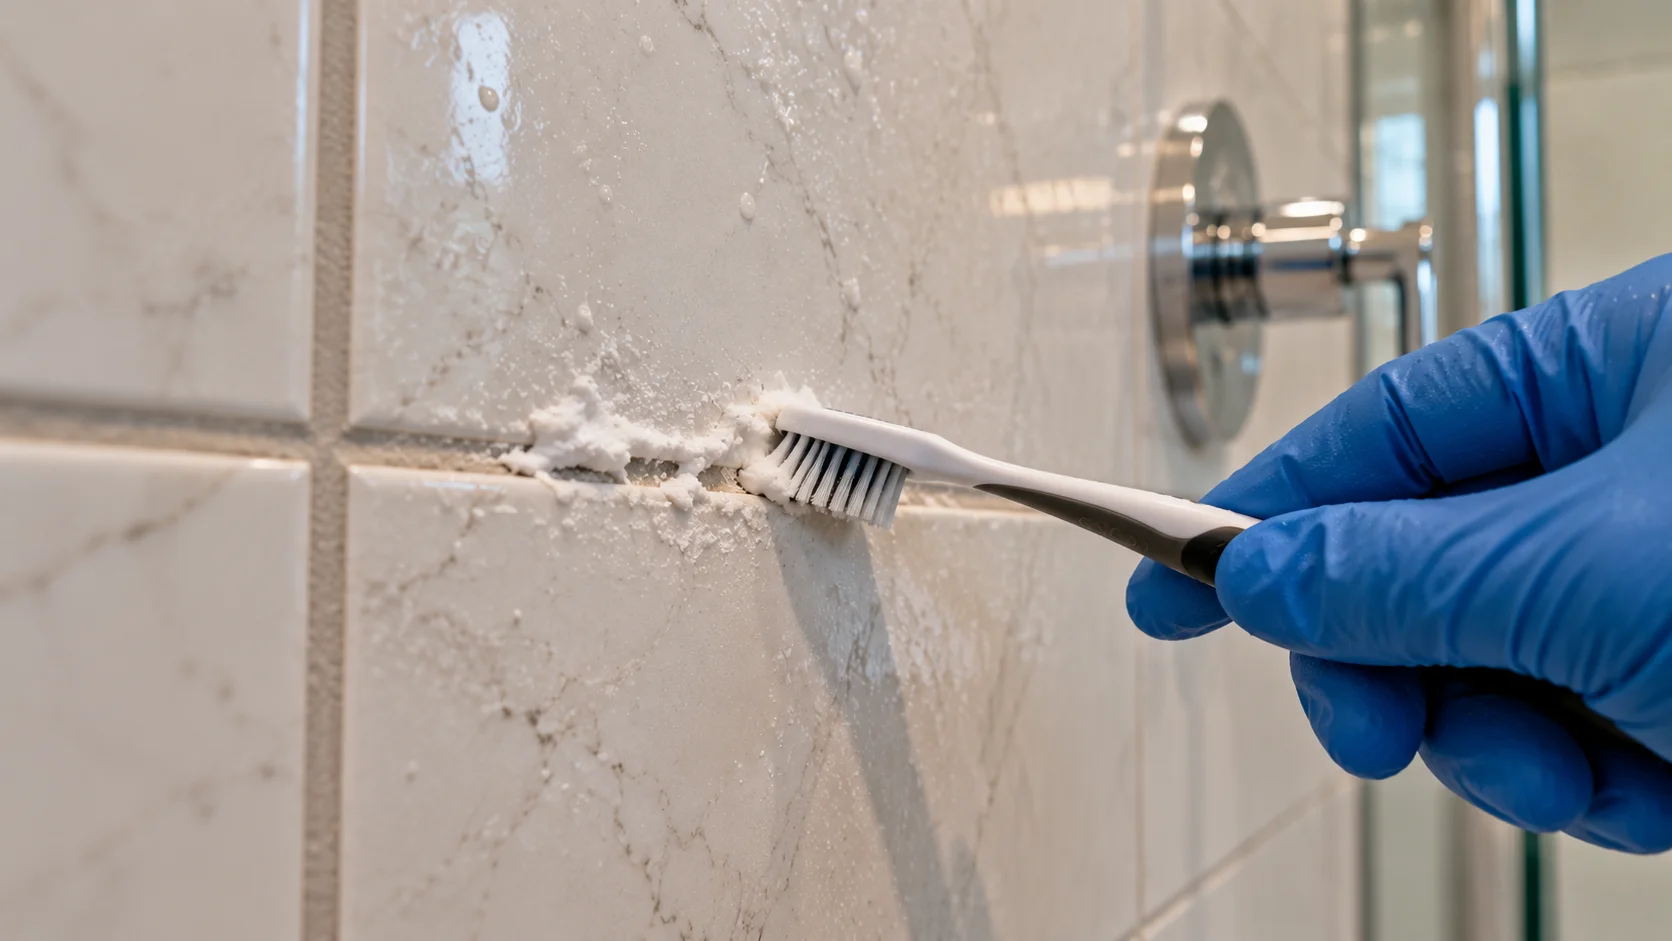
This is the method we recommend for most standard grout cleaning situations. It is effective, safe for virtually all tile types and grout colours, and will not weaken sealers as aggressively as bleach does with repeated use.
What you need: Baking soda, 3% hydrogen peroxide (the drugstore kind), old toothbrush or grout brush.
Mix 3 parts baking soda with 1 part hydrogen peroxide to form
a thick paste. If it is too wet, add more baking soda.
Apply the paste directly to grout lines with the toothbrush, pressing it into the joint.
Let it sit for 10 to 15 minutes. For darker staining or mold, leave it for up to 30 minutes.
Scrub vigorously in short back-and-forth motions along each grout line.
Rinse thoroughly with warm water.
Method 2: Baking Soda and Vinegar (Ceramic and Porcelain Only Never on Stone)
The fizzing action of vinegar on baking soda helps lift surface-level buildup effectively. However, repeated use of vinegar can gradually degrade grout sealers, so limit this to occasional deep cleans rather than your weekly routine.
Sprinkle baking soda over the grout lines.
Spray or pour white vinegar over the baking soda. Let it fizz for 5 to 10 minutes.
Scrub with the toothbrush.
Rinse well.
Again: Never use this method near natural stone tile. The vinegar does not stay on the grout it spreads, and even brief contact with marble or travertine can etch the surface.
Method 3: Oxygen Bleach for White or Heavily Stained Grout
For white grout that has turned grey or yellowish, or for significant mold staining that hydrogen peroxide has not fully resolved, oxygen bleach (sodium percarbonate powder sold as OxiClean, BioKleen Oxygen Bleach Plus, or similar) is highly effective. It is gentler than chlorine bleach and less likely to discolour grout over time.
Mix oxygen bleach with hot water per the package instructions.
Apply to grout lines and let it sit for 20 to 30 minutes.
Scrub and rinse thoroughly.
Ventilate the bathroom during and after.
Avoid using oxygen bleach on coloured grout it can lighten pigments unevenly.
Method 4: Steam Cleaning
A handheld steam cleaner is arguably the most effective tool for grout that is difficult to clean chemically and it uses no chemicals at all. Steam at high temperature penetrates deep into grout pores, kills mold at the root, loosens mineral deposits, and sanitizes the surface simultaneously.
Steam cleaning is safe for sealed ceramic and porcelain tiles and most standard cement grouts. Avoid it on:
Unsealed natural stone (steam forces moisture into already-porous stone)
Old, cracked, or loose grout (heat can worsen existing structural damage)
Damaged caulk (steam can penetrate behind deteriorating caulk)
Solving Specific Problems: Targeted Solutions for Each Type of Buildup
Removing Soap Scum from Shower Tiles
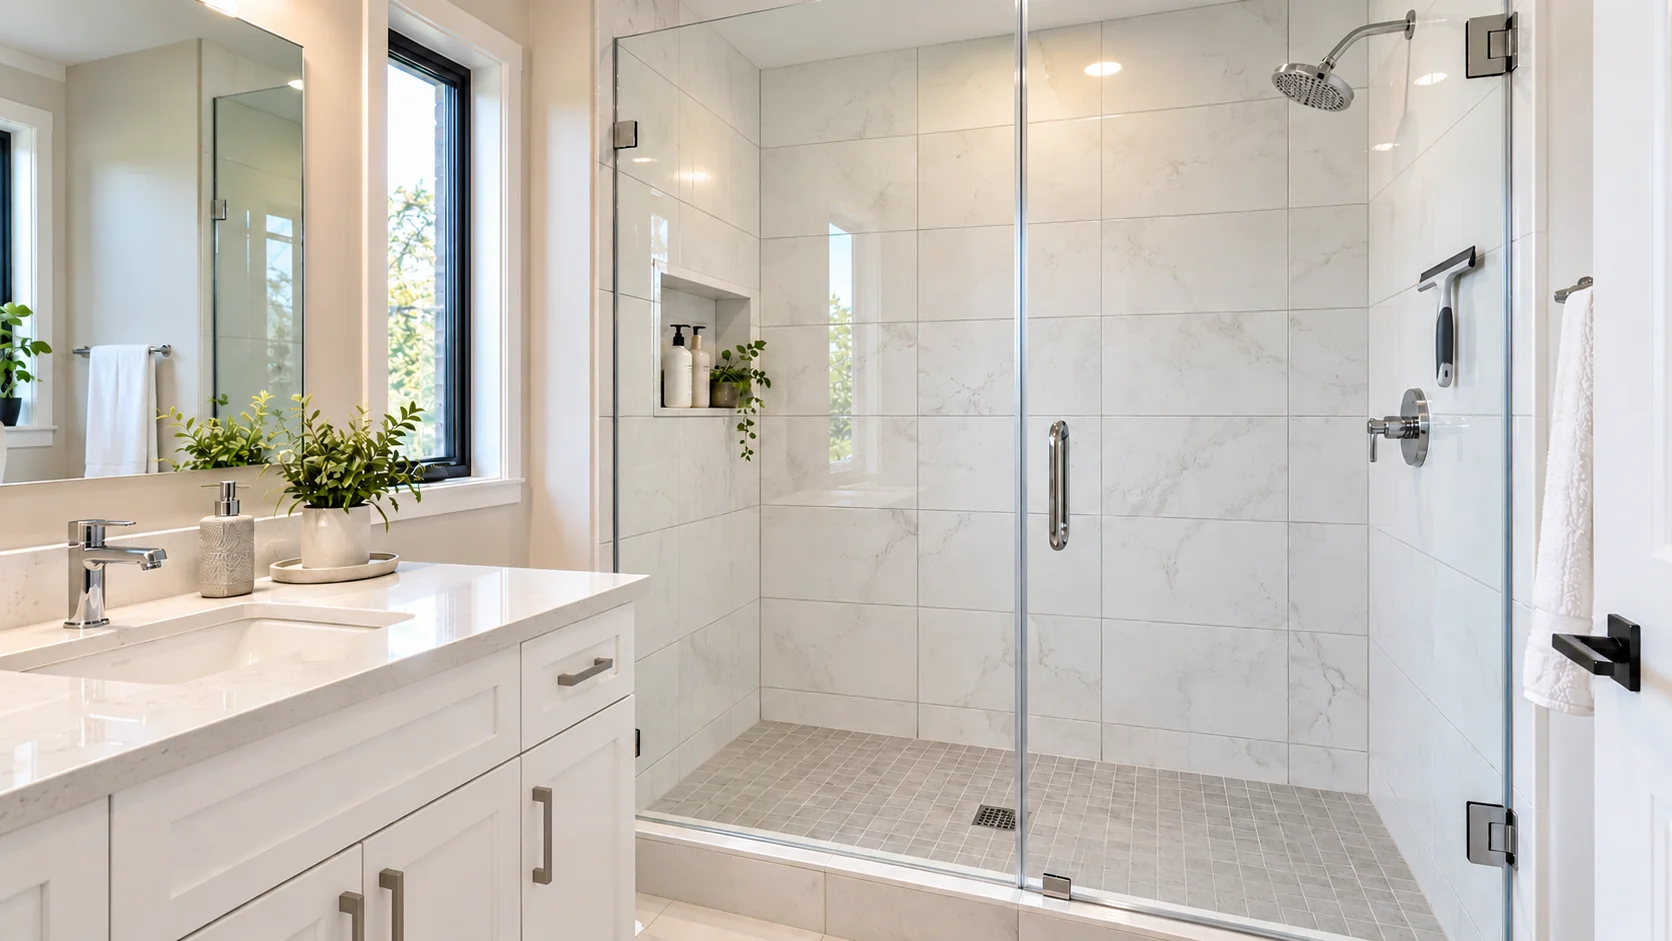
Soap scum is a calcium soap compound. It forms when the fatty acids in bar soap react with the calcium and magnesium ions in hard water. It is not water-soluble, which is why rinsing alone will not remove it.
Light soap scum on ceramic or porcelain: A 50/50 white vinegar and water spray applied with a 10-minute dwell time, followed by scrubbing and rinsing, removes most fresh or light soap scum effectively.
Heavy or caked-on soap scum: Apply a commercial soap scum remover look for one containing citric acid or lactic acid and labelled non-abrasive. Let it dwell for 10 to 20 minutes. Scrub with a nylon brush. You may need two applications on long-neglected buildup.
Soap scum on natural stone: Use a commercial stone-safe soap scum remover. These are formulated to break down soap buildup through mechanisms that do not involve acids. Your stone tile retailer or a stone care specialist can point you toward appropriate products.
Long-term prevention tip: Switching from bar soap to liquid body wash makes a significant difference. Bar soap contains talc and fatty acids that react aggressively with hard water minerals to form scum. Liquid body wash and shower gels produce far less soap scum.
Removing Hard Water Stains and Mineral Deposits
Hard water stains appear as chalky white, yellowish, or brownish deposits, typically around fixtures, along the bottom edges of walls, and wherever water pools. In areas with very hard water which includes much of the Waterloo Region and southwestern Ontario these can accumulate quickly and become very resistant to removal.
On ceramic and porcelain tiles: White vinegar dissolves calcium deposits effectively. Soak paper towels or cloth in undiluted white vinegar, press them directly onto the stained areas, and leave them for 30 to 60 minutes. The longer the contact time, the better. Scrub and rinse. For fixtures and showerheads with significant limescale, commercial limescale removers like CLR or Lime-A-Way work faster.
On natural stone: Never use vinegar or CLR on stone. Use a stone-safe limescale remover these products use non-acidic mineral removal chemistry. For severe buildup, professional stone restoration may be necessary.
Best prevention: A rubber squeegee used after every shower removes the majority of the standing water that eventually evaporates and leaves mineral deposits. Homeowners who commit to squeegeeing consistently report dramatically less mineral buildup and far easier tile maintenance overall.
For households in hard-water areas which, again, includes much of Kitchener, Guelph, Waterloo, and Cambridge a whole-home water softener is worth serious consideration. It does not just help with tiles; it extends the life of water heaters, pipes, appliances, and clothing. The upfront cost pays back in reduced cleaning time and product use.
Removing Mold and Mildew from Shower Tiles and Grout
Black, dark grey, or pink growth in grout lines, caulk, or on tile surfaces is typically mold or mildew (or occasionally Serratia marcescens, a pink bacteria all three are treated the same way).
On ceramic and porcelain grout:
Apply undiluted 3% hydrogen peroxide directly to the affected area. Let it sit for 10 to 15 minutes, allowing it to penetrate grout pores and kill mold at the root. Scrub with a toothbrush and rinse thoroughly.
For more severe mold: a diluted bleach solution (1 part household bleach to 10 parts water) is more powerful. Apply, leave for 10 to 15 minutes, scrub, and rinse. Ventilate the bathroom fully during this process never use bleach in an enclosed, unventilated space and wear rubber gloves.
Critical warning: Never mix bleach with vinegar, ammonia, or any other cleaning product. Mixing bleach with acids produces chlorine gas. Mixing bleach with ammonia (found in many glass cleaners and multipurpose sprays) produces chloramine vapour. Both are dangerous.
On natural stone: Hydrogen peroxide is generally safe on most natural stone. Test it on a hidden corner first, as some stones may lighten slightly. Never use bleach on coloured stone, veined marble, or polished stone it can cause irreversible discolouration.
When mold does not respond to surface cleaning: If mold returns within days of cleaning, or if scrubbing does not remove the discolouration, the mold has likely penetrated into unsealed grout deeply enough that surface treatment cannot reach it. In this case, regrouting is the proper solution not more cleaning. Similarly, if mold has appeared in the caulk lines (the flexible sealant at corners and the shower floor edge), that caulk must be fully removed and replaced. No surface cleaner will permanently kill mold inside deteriorating caulk.
Removing Rust Stains from Shower Tiles
Rust stains (reddish-brown streaks) typically originate from metal shower caddies, shelves, or fixtures that are corroding. The rust transfers from the metal to the tile surface.
On ceramic and porcelain: Bar Keepers Friend (liquid or powder form) is effective on rust stains. Apply, let sit briefly, and scrub gently with a soft cloth. Avoid using abrasive pads. Rinse thoroughly.
On natural stone: Consult a stone care professional before attempting rust removal on natural stone. Many rust removers are acidic and will etch the surface. Specialist poultices designed for stone rust removal are available through stone care suppliers.
Prevention: Replace rust-prone metal shower caddies with plastic, stainless steel, or rust-resistant coated options. Check fixtures regularly and address any corrosion early.
Cleaning Natural Stone Shower Tiles: A Dedicated Guide
Because the consequences of using the wrong cleaner on natural stone are permanent and costly, this deserves its own section.
The two non-negotiable rules:
Only ever use pH-neutral cleaners (pH of 7, or products specifically labelled "safe for natural stone").
Never use any acid no vinegar, no citric acid, no lemon juice, no most commercial bathroom sprays.
Regular maintenance clean for marble, travertine, limestone, and slate:
Run hot water to generate steam and loosen surface grime.
Apply a small amount of pH-neutral stone cleaner, or a few drops of mild unscented dish soap diluted generously in warm water.
Wipe tiles with a damp microfiber cloth using gentle circular motions. Do not scrub.
Rinse with clean water.
Dry immediately and thoroughly with a clean, soft cloth. Never leave water standing on natural stone prolonged moisture exposure can cause staining, and mineral-rich water leaves deposits on stone just as it does on ceramic.
For soap scum on natural stone: Use a stone-specific soap scum remover. These products break down soap buildup through neutral chemistry that will not etch the surface.
For grout in natural stone tile showers: Use a pH-neutral grout cleaner or the baking soda and hydrogen peroxide paste method. Avoid all acidic methods.
If your natural stone is already etched or dull: Etching cannot be cleaned away. It is physical surface damage. A professional stone restoration specialist can hone and re-polish marble or travertine to restore the original finish but this is a skilled trade service, not a DIY project. Preventing it in the first place is far simpler than fixing it afterward.
Cleaning Glass Shower Tiles
Glass tiles are non-porous and relatively easy to maintain, but they show every water spot, smear, and soap streak more visibly than any other tile type. Discipline with squeegeeing is essential.
For regular cleaning: Apply a small amount of pH-neutral tile cleaner or glass cleaner to a soft microfiber cloth and wipe in circular motions. Never use abrasive scrubbers or pads even light scratching will dull a glass tile surface.
For water spots and mineral deposits: A spray of diluted white vinegar, left for 5 to 10 minutes and buffed away with a microfiber cloth, removes water spots from glass tile effectively. Rinse well afterward.
For soap scum: A diluted dish soap solution works well. Apply, let sit briefly, scrub gently with a soft cloth or non-scratch sponge, and rinse.
After every shower: Squeegee and buff with a dry cloth. Glass tiles that are dried after each use stay clean far longer with minimal effort.
How Often Should You Clean Shower Tiles?
The answer depends on household size, water hardness, and tile type but here is a practical schedule for most Ontario homes:
After every shower:
Rinse tiles briefly with the showerhead to flush soap residue
Squeegee walls and glass panels
Run the bathroom exhaust fan for 20 to 30 minutes (or open a window)
Weekly:
Full tile scrub using the step-by-step process above
Targeted grout brushing with baking soda paste
Wipe down fixtures, handles, and the showerhead
Monthly:
Deep grout treatment (hydrogen peroxide paste or oxygen bleach for white grout)
Clean the shower drain (remove the cover and pull out any hair)
Inspect caulk lines for discolouration, lifting, or cracking
Check grout for cracking, missing sections, or persistent staining
Every 6 to 12 months:
Apply grout sealer (more frequently in high-use showers or hard-water areas)
Inspect tiles for cracks, loose tiles, or areas where water may be getting behind the wall
Replace caulk if it shows any mold that does not respond to cleaning, or any lifting from the surface
Daily Habits That Reduce Cleaning Work by Half
The most effective cleaning strategy is preventing buildup in the first place. These habits take almost no additional time but compound significantly over weeks and months.
Squeegee after every shower. Thirty seconds of squeegeeing after each shower removes the majority of the water that would otherwise evaporate and leave mineral deposits behind. Homeowners who adopt this single habit consistently report needing far less scrubbing during weekly cleans. Buy a good quality squeegee and hang it inside the shower where it is actually convenient to use.
Switch from bar soap to liquid body wash. Bar soap contains talc and fatty acids that react with hard-water minerals to form soap scum. Liquid body washes and shower gels produce dramatically less scum. This one change reduces the amount of soap scum buildup noticeably within weeks.
Run the exhaust fan during and after every shower. Mold cannot grow without sustained moisture. Running the bathroom fan during your shower and for at least 20 minutes afterward removes the moisture from the air before it settles on surfaces and feeds mold growth. If your bathroom fan is old or undersized, replacing it is one of the most worthwhile bathroom maintenance investments you can make.
Keep the shower door or curtain open when not in use. Air circulation allows surfaces to dry. A closed shower door or curtain traps humid air inside and keeps surfaces damp far longer ideal conditions for mold.
Use a daily shower spray. Products like Method Daily Shower Spray, Scrubbing Bubbles Daily Shower Cleaner, or a homemade spray (equal parts water and rubbing alcohol in a spray bottle) misted onto tiles after each shower help break down soap and mineral residue before it hardens. This takes five seconds and meaningfully reduces weekly cleaning effort.
Common Mistakes That Damage Shower Tiles And How to Avoid Them
Using vinegar on natural stone. We have said this multiple times because the mistake is that common and the damage is that permanent. If you have marble, travertine, or limestone tiles, keep every acidic product away from them entirely.
Scrubbing aggressively instead of using proper dwell time. Harder scrubbing does not compensate for insufficient dwell time. In fact, aggressive scrubbing with abrasive materials scratches tile glaze, making the surface rougher and harder to clean over time. Apply your cleaner, let it work chemically for the recommended time, then scrub with appropriate tools.
Not rinsing thoroughly. Leftover cleaning product residue on tile surfaces creates a thin film that attracts dirt faster than a clean tile would. After every cleaning session, rinse until the water runs completely clear and the surface no longer feels slick.
Leaving surfaces wet after cleaning. The whole point of cleaning is to remove buildup then immediately leaving moisture in place begins the process of new mineral deposits forming. Dry or squeegee after every clean and after every shower.
Using bleach routinely on grout. Bleach is effective for mold treatment but gradually weakens grout sealer and can bleach and damage coloured grout with repeated use. Reserve chlorine bleach for periodic mold treatment, not for weekly cleaning.
Ignoring caulk. The caulk at the corners of your shower and along the shower floor is a different material from grout. It is a flexible silicone or latex sealant, and it deteriorates faster than grout. Once mold has penetrated inside deteriorating caulk, it cannot be killed with surface cleaners the caulk must be physically removed and replaced. Inspect your caulk at least quarterly and replace it at the first sign of mold inside it, cracking, or lifting from the surface.
Mixing cleaning products. Combining chemicals without understanding their interactions is dangerous. Bleach and vinegar produce chlorine gas. Bleach and ammonia produce chloramine vapour. If you are switching between products during a cleaning session, rinse thoroughly with water before applying the next one.
Should You Seal Your Shower Grout?
Yes. Almost certainly.
Grout is porous cement. Without sealing, it absorbs water, soap, oils, and airborne bacteria continuously. Grout sealer fills those microscopic pores, creating a surface that repels moisture and is dramatically easier to keep clean. Sealed grout stains less, grows mold less readily, and maintains its colour for far longer than unsealed grout.
How to seal grout:
Ensure the grout is completely clean and fully dry. After a deep clean, wait 48 to 72 hours before sealing.
Apply penetrating grout sealer using a small brush, a dedicated applicator bottle, or foam applicator pad along each grout line.
Allow it to penetrate for the time specified on the product instructions (typically 5 to 15 minutes).
Wipe off any excess sealer from tile surfaces before it dries dried sealer on tile faces requires more aggressive removal.
Allow the sealer to cure fully before running the shower (typically 24 to 48 hours).
Apply a second coat if the product directions recommend it.
How often should grout be sealed?
In shower environments, penetrating sealers should be reapplied every 1 to 2 years. High-traffic showers used by multiple people daily may need resealing annually. Topical sealers (which sit on the surface rather than penetrating) need reapplying every 6 to 12 months.
A simple test: Drip a few drops of water onto your grout lines. If the water beads up, your sealer is still working. If the water absorbs into the grout immediately, it is time to reseal.
Natural stone tiles also need sealing separately from the grout, using a sealer specifically formulated for stone. Most stone tile suppliers can recommend appropriate products.
When to Stop DIY and Call a Professional Cleaning Service
There are situations where home cleaning genuinely cannot achieve the result you need and recognising them early prevents the frustration of trying the same approaches repeatedly while the problem gets worse.
Call a professional when:
Mold has spread extensively through grout lines, penetrated behind caulk, or shows any sign of reaching the drywall or substrate behind your tile
Your natural stone tiles are etched, permanently dull, or deeply stained despite using the correct products
Soap scum or hard water scale has accumulated for years and resists multiple rounds of appropriate treatment
You are preparing your home for sale and need the bathroom looking genuinely clean, not just clean-ish
Grout is crumbling, cracked, or missing in multiple places a situation that needs repair, not cleaning
You do not have the time, physical ability, or simply the desire to do this work yourself
Professional cleaners bring commercial-grade equipment (including professional steam cleaners and extraction tools), specialist products not available in retail stores, and the experience to identify problems that need repair versus problems that need the right cleaning approach. You can also explore our professional cleaning portfolio to learn more about our cleaning work.
At Red & White Cleaning Services, we provide professional deep cleaning, bathroom cleaning, residential cleaning, commercial cleaning services, and post-construction cleaning across Guelph, Kitchener, Waterloo, Cambridge, Elora, Elmira, Milton, Mississauga, New Hamburg, Paris (Brant), London, and surrounding communities across Southern Ontario.
Whether you need a one-time professional deep cleaning service, scheduled recurring cleaning, or a full home clean after a renovation, our team shows up on time, uses the right products for your surfaces, and does the work properly.
Get a free, no-obligation quote from Red & White Cleaning Services →
Call or text: 519-574-1552
Email: redandwhiteclean@gmail.com
Frequently Asked Questions - How to Clean Shower Tiles
Can I use vinegar to clean my shower tiles?
Yes, but only on ceramic and porcelain tiles. Diluted white vinegar (50/50 with water) is effective for removing soap scum and light mineral deposits on these tile types. Never use vinegar or any acidic cleaner on natural stone tiles like marble, travertine, or limestone. Vinegar causes permanent acid etching on carbonate-based stone.
What is the best homemade cleaner for shower tiles?
For ceramic and porcelain: a 50/50 mix of white vinegar and water works well for general cleaning and soap scum removal. For tougher buildup, a paste of baking soda and dish soap is highly effective. For grout specifically, baking soda mixed with 3% hydrogen peroxide into a paste is our top recommendation.
For natural stone: a few drops of mild dish soap diluted in warm water, or a commercial pH-neutral stone cleaner.
How do you get soap scum off shower tiles without scrubbing?
Apply a commercial soap scum remover or a vinegar and water spray (ceramic/porcelain only) and allow it to dwell for 15 to 30 minutes. The longer it sits, the more work the chemistry does and the less physical scrubbing you need. Very heavy or long-standing soap scum will always require some mechanical scrubbing on the first treatment but consistent weekly maintenance dramatically reduces the effort needed over time.
How do I remove black mold from shower tile grout?
Apply undiluted 3% hydrogen peroxide directly to the affected grout lines, let it sit for 10 to 15 minutes, scrub with a toothbrush, and rinse. For more severe mold, use a diluted bleach solution (1 part bleach to 10 parts water), ventilate the bathroom fully, wear gloves, and follow the same process. If mold returns within days, it has penetrated deeply into unsealed grout and the grout likely needs to be replaced.
Why do my shower tiles still look dirty after I clean them?
This is almost always one of three things: (1) hard water mineral deposits that were not fully dissolved and removed try a dedicated hard water stain remover with a longer dwell time; (2) grout that needs separate targeted cleaning from the tile surfaces the two require different approaches; or (3) cleaning product residue that was not fully rinsed this leaves a film that makes tiles look dull and collects dirt faster. Rinse more thoroughly and dry immediately after.
How do I keep shower tiles clean between deep cleans?
Squeegee after every shower, run the exhaust fan for 20 minutes post-shower, leave the shower door open to allow airflow, and switch from bar soap to liquid body wash. A daily spray with a preventive shower spray product or a homemade water-and-rubbing-alcohol spray takes seconds and prevents buildup from hardening between weekly cleans.
How often should shower grout be sealed?
In shower environments, penetrating grout sealer typically needs reapplication every 1 to 2 years. Test by dripping water onto grout lines if it beads, the seal is holding; if it absorbs immediately, it is time to reseal. High-use showers should be tested and resealed annually.
Is it safe to use a steam cleaner on shower tiles?
Yes, for most ceramic and porcelain tiles and their grout. Steam cleaning is highly effective and chemical-free. Avoid using steam on unsealed natural stone, old or cracked grout, or areas with damaged caulk or tile adhesive.
When should shower tiles be professionally cleaned instead of cleaned at home?
When mold is extensive or recurring despite treatment, when natural stone has been damaged or is deeply stained, when years of buildup has accumulated beyond what home methods can effectively address, when grout is structurally failing, or when you simply want the job done properly without spending your weekend doing it.
Does hard water affect how often I need to clean shower tiles?
Significantly. Households in hard-water areas including much of the Waterloo Region, Guelph, and southwestern Ontario accumulate mineral deposits faster and need to clean more frequently. A water softener reduces the problem at the source. Regular squeegeeing minimises deposits between cleans.
A System That Works, Not Just a List of Tips
Clean shower tiles come down to three things: knowing what you are dealing with (chemistry, not just dirt), using the right products for your specific tile type (not a one-size-fits-all spray), and maintaining a consistent routine that prevents buildup from reaching levels that require heavy scrubbing to remove.
For most Ontario homeowners dealing with hard water, soap scum, and grout that wants to turn grey or black, a weekly light clean combined with monthly grout treatment, annual sealing, and the daily habits of squeegeeing and ventilating will keep a shower genuinely clean with reasonable effort.
When things have progressed too far for that or when you would simply rather spend your time differently professional cleaning is the right call.
Red & White Cleaning Services provides professional residential and commercial cleaning across Guelph, Kitchener, Waterloo, Cambridge, Elora, Elmira, Milton, Mississauga, New Hamburg, Paris (Brant), London (ON), and surrounding communities throughout Southern Ontario. We are fully licensed and insured, we use the right products for every surface type, and we show up on time and do the work properly. To discuss your cleaning needs or request a quote, contact Red & White Cleaning Services.